Showing posts with label flowers. Show all posts

May 12, 2014

Big news!!

We're married!


Now that the crazy year of planning is done, I hope to share more about our day soon!

August 17, 2013

Bridal flower crown

Recently a friend asked if I could make a headpiece for the bride from a bachelorette party that she was organizing.  She wanted a floral crown that was a little more earthy than typical party gear. She shared a few pins and pictures with me for inspiration and basically let me choose the color scheme and overall look of the piece.

The party was tonight, so now I'm free to share pictures of what I made without ruining the surprise!  (Naturally, I had to try it on to test out the fit, so bear with the pictures of me in someone else's crown.)


I usually shop at Joann's for my craft supplies (they sell most of what I need, and send me coupons through their mailing list), but for this project, I opted to get my stuff at Michael's.  I've always been hesitant of silk flowers, but since this piece needed to last, I was pretty set on trying to find some that I liked.

The wedding is coming up this fall, so I wanted this piece to be a little autumn-ish, but still summery enough for August.  I used mostly small white flowers and some orange and green ones.  I found perfect glassy looking green and orange beads that were pretty earthy, but a little fancy too.


I twisted the wrapped wire and flowers together and fastened the flowers on it pretty securely (I also took each flower off and glued them back onto their plastic stems since they have a tendency to pop off pretty easily).


I didn't know how big to make it, but since I wanted it to fit and stay on, I loop each end of the crown and braided yarn to tie the whole thing on.  The crown itself has some flexibility, so it can be bent to fit better if needed.


I'm so happy with how this turned out!  I love getting requests for projects; I feel inspired to try new things and do my best to make them work.  The bachelorette party is happening now, so I hope that the bride-to-be enjoys this crown as much as I enjoyed making it!  (In fact, I feel some inspiration for my own wedding plans!)

April 28, 2013

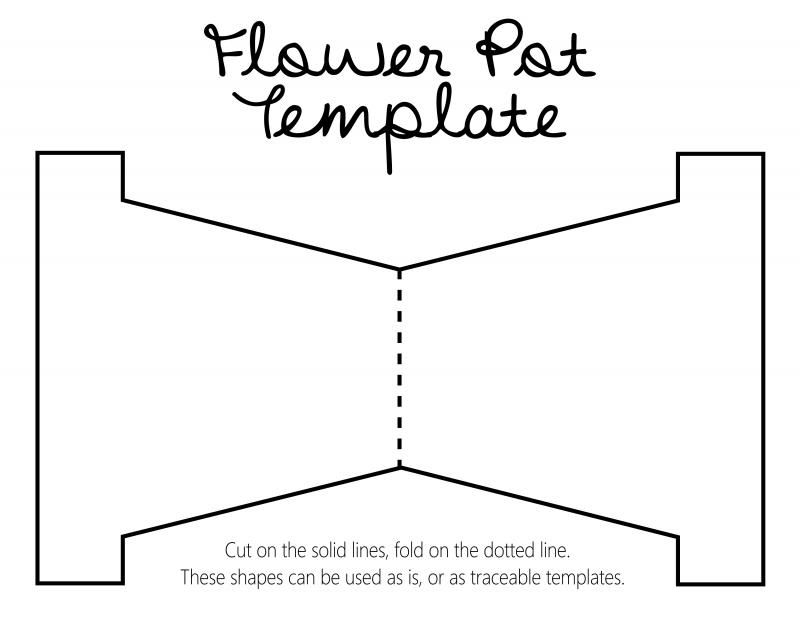
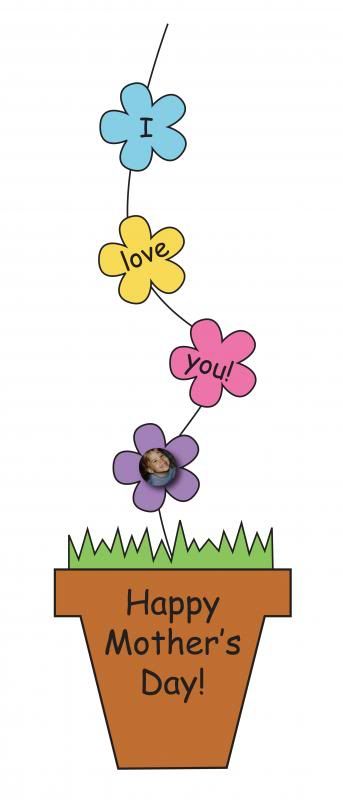
DIY Revisited: Mother's Day flower pot with template


Last year I wrote a post with an idea for a Mother's Day card that I like to do at school with my kids each year. This year I decided to make a template to speed up the process!


Here are your options for different ways to use the pattern:

1. Print the pages and either use them as is.  You can let kids cut and color the pieces, but normal printer paper will be more on the flimsy side.
2. Photocopy them onto construction paper.  This is what I'm doing at work, we have a heavy duty printer that will take construction paper without a problem.  Then I let the kids to the cutting and help them put all the pieces together.
3. Cut out the pieces and and use them to trace the shapes onto construction paper.  Then let the kids cut their pieces and finish the project.

Click here to download the PDF.


Hope this helps make this project easier some of you out there!  If you want more information and details on putting the card together, go to my original post.  Happy (almost) Mother's Day!

April 01, 2013

Little projects

I've been crafting like crazy lately, getting things ready for my first craft show!  Our house seems to be overtaken with my supplies... sewing machine on the table, piles of fabric across the living room floor, yarn everywhere. I will be a relieved when the show has come and gone, and I know I made things I genuinely liked.  Some of my favorite things to make are these little brooches and hair clips with flowers and embroidery. 

Here are a few of my favorites:


Some are felt and beads, some have little crocheted flowers I whipped up.   It's nice being able to have variation between pieces by changing things slightly.


 Well, back to work.  I'm very excited and nervous about the show, so hoping it goes well!  (I may have had a nightmare that I didn't sell anything, so here's to hoping I sell at least one or two things!)

February 24, 2013

A weekend project

Oh, I must be just about the worst blogger ever. It's been, what... a month or so? Well, in my defense, my computer is on it's way out and I haven't been able to edit photos at all. Hoping to remedy the situation soon though!

In the meantime, I've done many projects that I hope to show soon. Here's what I made this weekend:


(Forgive the iPad at night picture quality)

Wrist warmers with flowers to get me through the last of winter!  I bought the green yarn for a project I was working on, but it wasn't the right color (serves me right for not saving my yarn labels).   I loved the color and super soft texture, so I kept it for other projects.  I made up this pattern as I went, but I think I remember it well enough to make another similar project again soon.  The flowers were made from scraps of yarn and buttons lying around.  A cozy, simple, comfy weekend project.  I can't wait to wear these out soon!  

November 24, 2012

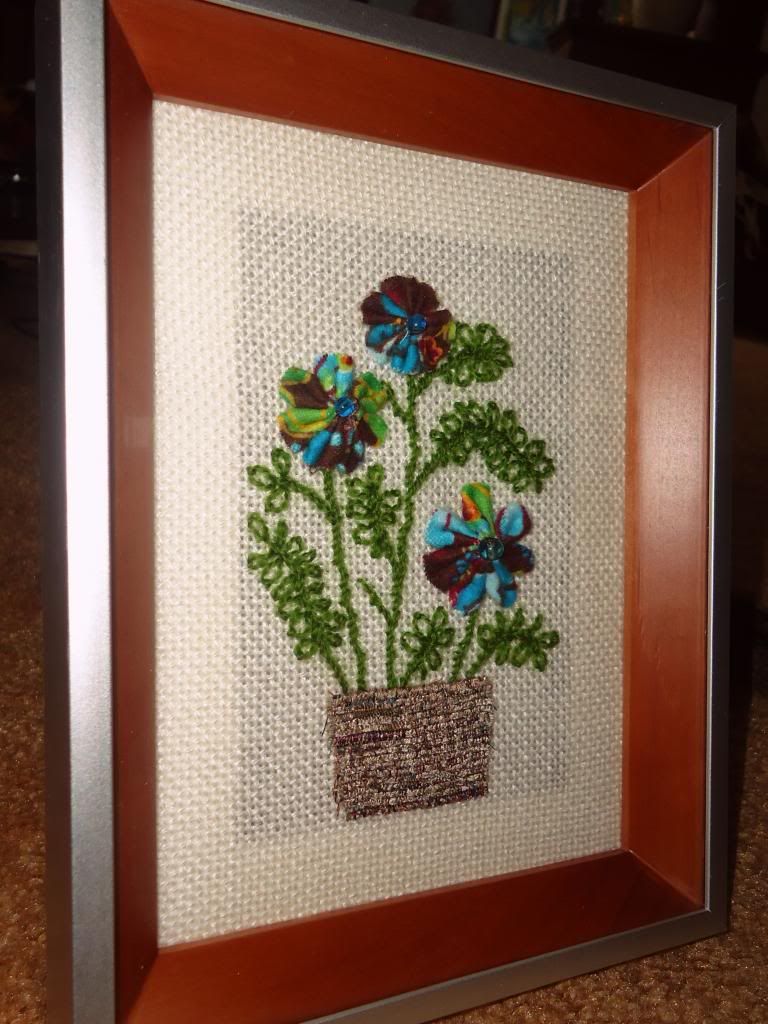
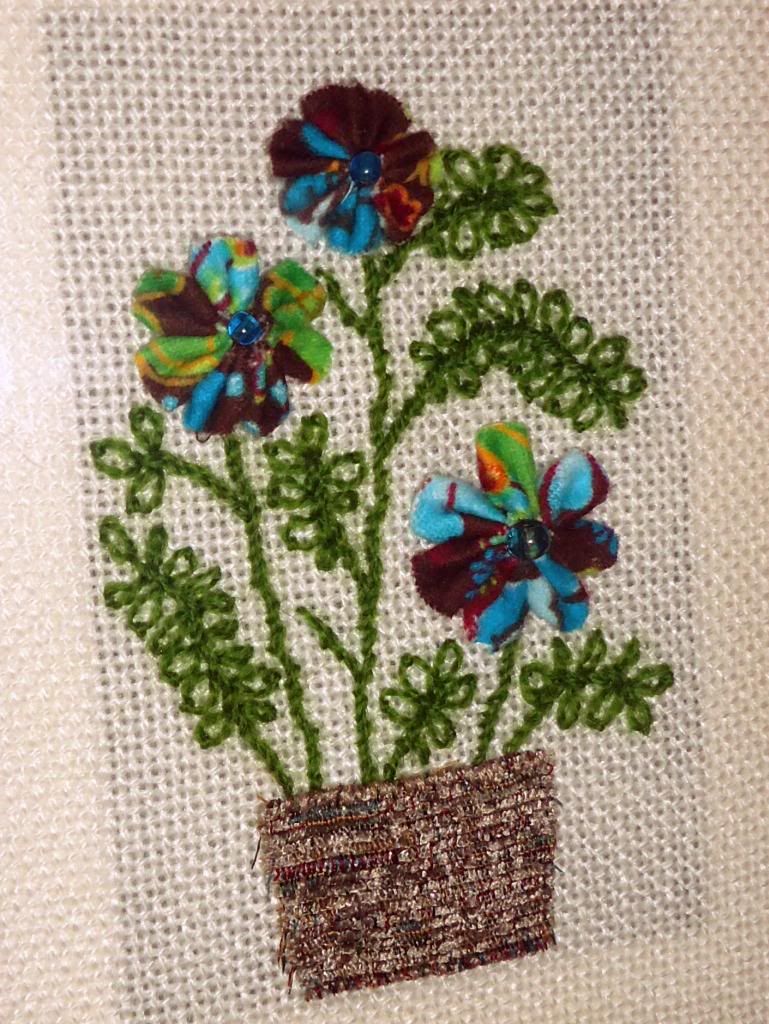
A DIY Christmas: Framed floral art

Because money is tight and I like to give personal presents, I've recently started working on handmade Christmas gifts for friends and family, and this is one of the first items I've finished.  


I sewed the flowers with this technique  and secured them to the backing fabric.  (Since I haven't done much needle art, I don't know what the technical term for the cloth is.)  I got a nice chunk of the fabric at  thrift store in a craft bag with some small skeins of yarn for $3.  I cut the flower pot out of some leftover Halloween remnants and sewed it on.  Then I looked at the pattern for my cat wall hanging to help with some stitches for the stems and leaves.  The stems were a stem stitch and the leaves are detached chains.  Then I mounted the picture in a $2 frame from the thrift store.


I love how this project turned out!  It was simple to make and totally different from anything I've made before.  It was also a really fun project because I winged the whole thing and got to use my artistic eye to decide where stitches should go, rather then following a pattern, counting stitches, or measuring pieces.  I can't wait to give this to my friend for Christmas!

November 17, 2012

Thrift find: incomplete embroidered wall hanging

A few months back we were at Goodwill and I found an embroidery kit in a bag for $3.  I opened the package to find this incredibly gorgeous, nearly completed piece.  I was in love!  I'd been telling myself I wouldn't get more embroidered wall art because we have so many, but I had to buy this.


It sat for a little while, and then I got to work finishing it.  Really, all I needed to do was the basket of flowers, the lines on the floor and wall, and a few other tiny details.  The small bit I did do took me quite a bit of time; I needed to learn stitches and get them looking like they fit in with the rest of the work. You can see some wrinkles from the embroidery hoop that the fabric likely sat in for years, but I haven't figured out how to get rid of them out.

The detail and attention put into the piece by whoever started it is just beautiful.  I wonder what happened to prevent them from finishing.  The copyright on the package was from the 70s, but because the original price tag said $25, I figure it wasn't purchased that long ago BUT since the tag was also from a craft store/ greenhouse that I used to work at that closed nearly ten years ago, it's not too recent.  Anyways, I'm so glad I found this and was able to finish it.   I found a frame at the thrift store for $2 that fit perfectly.

I love the cat on the afghan.  I'd love an identical, full size one like that to curl up with.  I mean, the blanket, not the cat... we have enough felines in our home for now.


I think the cats like the piece too.  I hung it above the bookshelf in our dining room.  Five dollars well spent!

October 01, 2012

Accessorizing our craft room.

After I organized, it was time to decorate the room!  Almost nothing was purchased for this space- most things I already owned and some I refurbished, the rest were thrifted. 


The big picture in the middle was thrifted a few years ago for $2.50.  It's also identical to a picture hanging in the kitchen of the set of Malcolm in the Middle!  I noticed that during a marathon this past winter.  The framed leaves were maybe from Target, but I can't remember. 

I whittled down my button collection to make this heart on a fabric covered board.  I added a stack of movies, although, these will likely change depending on my mood. 
I repainted this little shelf with spray paint (it used to be navy) and put up some little knick-knacks.  I love this picture of the girl and her kitten; it says "Friendly thoughts keep hearts in touch."  39 cents!
This pincushion was my grandma's, along with the brown pitcher in the bottom right corner.  The little animals are from the antique mall.  I planned on putting them in a terrarium, but might leave them here for now.  Little craft bottles for whatever.  Oh, and the vase; it matches the tablecloth you'll see in a minute, so I had to add it to the arrangement.


Another shelf I repainted.  And yes, those are kittens having a tea party.  My mother knows me so well!

I wanted to add a few plants, so I put some clippings I'm trying to root in vases.  The hanging one is rosemary (smells great!) in a little glass bottle with tiny blue beads in the bottom.  The orange vases from Ikea are wrapped in hemp and beads.


The table cloth I'm using was $2 at the thrift store.  I really wanted something to put over the old plastic table top, and something that would be easy to clean if I accidentally splashed paint.  As much as I used giggle at my grandma's old vinyl cloths, I knew that's what I needed.  I really lucked out when I found this one- the print is perfect!

So there's the craft room!  There are a few other details I wasn't able to get good pictures of or have since added, but this is most of it!  I hope it gives people some ideas for how to decorate and arrange their own space on a budget!  I learned that it may take time to create a new space, and it may not be perfect right away, but that's alright!  I mean, I might as well use the craft room to create things for that space!

August 19, 2012

Our new craft room!!

Well, we completed out first major project since I moved in with Mark, and it's pretty much my life dream: a craft room!  


The entire project was done on a budget- basically only paint and a few small thrifted items to spruce up the space, so I hope it provides ideas for using personal items to create a whole new room!

 The walls were white with an old 90s children's border, so we pulled that down and painted the room blue.  It was supposed to be be more grayish, but since it's our first painting experience, I don't really mind.  Plus, it looks different depending on the lighting.


The table had been in the dining room before I moved in with my own.  I suppose it would make more sense if there were a chair at the table, but we're working on that! 


We moved the futon (aka Mark's old bed) in.  As nice as a table is for paper crafts, I sometimes like to just lounge while I crochet, sew, and bead.  Dexter (the black lump on the futon) seems to have decided that this is his craft room. 


We also added this end table with a small TV and a bigger shelf on the wall.  Extra storage and entertainment for craft time.  My parents dropped off a record player today, so that might be great for non-television entertainment (notice the Wham! album on the shelf, awww yeah!)  

Organization and decorating are essential for a craft room, so I'll be posting more of the details later this week!  

August 14, 2012

The wedding of the century

Our friends got married this past weekend!  It was beautiful, so I'll let the pictures speak for themselves.


The daughter of the bride!


Decorations:


And the dance (we brought glow sticks!)

Mark and the groom.


 Me and the lovely bride.


The framed guestbook.