Showing posts with label cats. Show all posts
Showing posts with label cats. Show all posts
February 28, 2014
One year ago
March 09, 2013
Super easy DIY bobby pin saver
For years I've been dealing with a problem women all over the world struggle with: where the heck did all my bobby pins go?! It seems like I buy those huge packs a few times a year and then can't find any hair pins when I really need them. I clean my house, expecting to hit a jackpot, but no such luck. Where did all my bobby pins go??
I decided to figure out a solution with things I had around the house and am sharing what I came up with. It's very easy and you may already have the supplies around your own home!
1. First, gather your supplies:
-A photo frame without the glass (mine was 8"x10", but smaller would work)
-Fabric slightly larger than your frame
-Magnetic tape
-Scissors
-Multi-surface adhesive (I used Scotch Maximum Strength Adhesive)
2. Take your frame apart and cut your magnetic tape to fit the backing piece. Double check that the piece will fit in the frame with this attached. If not, cut it a little shorter.
3. Cut more pieces of tape. I used 6.
4. Peel the backing from your tape and mount it on the backing. If it doesn't stick well, use a little of your adhesive.
5. Cut your fabric a little larger than your backing piece. I left an inch of fabric on each edge. Double check that the bobby pins stick with the fabric over the magnets. If they don't, you may need thinner fabric or stronger magnets.
6. Wrap the fabric over the piece and glue on the back.
7. Put your backing piece back in the frame.
8. Hang and never spend your mornings looking for bobby pins again!
Hope this is an easy solution for others! I'm pretty proud of this project and hope that it will be a while until I need to buy more bobby pins (I just have to remember to actually stick them up there!) Good luck with this little project!
January 13, 2013
Home sewn Hobbes plush
I recently made my first stuffed animal (and perhaps my last): a stuffed Hobbes!
A few weeks before Christmas a co-worker asked if I could make the comic cat as a plush toy for her son. I was pretty occupied making gifts for my own family, but I told her I could finish after the holidays if she'd like to wait.
I found a free pattern online, find it here. It was a great pattern to follow- clear instructions and tons of pictures. If you decide to try out this project, I'd definitely recommend following this plan!
Then, after the holidays, I got started. I bought 1/2 yd. orange no-pill fleece, 1/4 yd. each of black and white. I'd say I used half the fabric, but I wanted to have extra in case I needed to re-cut any pieces. The fabric was 1/2 off at Joann Fabrics, so I spent $5 on materials. I already had thread and stuffing, so I was ready to get to work.
I followed the directions to a T, which was sometimes hard because I like to make things up as I go when I'm working on a project. Really, the directions are so clear and well-written I wouldn't have done anything differently. That being said, I didn't find the project too easy...
Here are some of the challenges I faced in the project:
1. Machine-related issues. I had some problems with my machine jamming up on parts of the fleece, some stitch skips, and thread breaking. I think this could have been avoided with a good cleaning and oiling before I'd begun the project. I even changed out my needles twice in the process.
2. Bunching where I sewed on the limbs. If you look at the original pattern, the arms and legs are sewn on perfectly, but I just couldn't figure out how to get mine that neat. That being said, it doesn't take away from the toy and it still looks great, just not as good as the original.
3. Hand sewing the stripes on. I feel like there's an easier way to do this... maybe sewing strips of the orange and black together and then trying to cut the other pieces from that, but I don't know, I just know that this part took a lot of time.
All in all, I'd say this took me about 10+ hours to complete. It would probably have gone quicker for a more skilled sewer, or if I'd taken the time to get my machine in tip-top shape before hand.
The toy turned out so cute! If you're wondering about size, it was about a foot tall, from top of the head to the bottom of the torso... a pretty perfect size for a stuffed animal. I gave it to the co-worker who's son loved it (even if it did come after Christmas) and he sent back a letter to Santa's elves (that's me!). I'd maybe consider doing another project like this again now that I have the experience, but for now I'm back to my own projects for at least a while!
January 10, 2013
More life and cats
It seems that the recent trend in my life has been crafting incessantly, working occasionally, and blogging never. I made Christmas gifts for family, a stuffed animal for a co-worker's child, plus a few personal projects, yet photo editing and writing have been low on my list of priorities. I suppose I'll get there soon...
In the meantime, another entry about cats. This time, Miles: handsome, beautiful Miles got a haircut. About a year ago, before I moved in with Mark and his cats, I groomed Miles to perfection: got rid of knots, dreads, and otherwise unattractive hairy situations. Then, this summer, after I moved into the house with my own cats, Miles seemed to become, well... depressed. He quit grooming, started whining, and developed a drinking habit (water, that is... a serious preoccupation with water from the faucet).
He's since been to the vet who suggested a grooming. (I'd tried to comb out the knots, but even with my expensive, well-made brush, wasn't making much progress.) So Mark took him for a lion cut.
Honestly, he looks totally ridiculous, cute, and fragile. I'm practically afraid to pick him up now. BUT, on the plus side of things, his fur will grow back and we're hoping he'll keep up the maintenance (with our help) to be a happy, comfortable, handsome kitty.
The other cats seem interested in his new look (and probably the smell of the groomer's that's lingering).
He also wasn't too interested in posing until I played with him, but these pictures are priceless. I'm sure his fur will grow back before I even know it, so I have to capture this pictures while I can!
And soon, posts of awesome craft projects... I hope!
In the meantime, another entry about cats. This time, Miles: handsome, beautiful Miles got a haircut. About a year ago, before I moved in with Mark and his cats, I groomed Miles to perfection: got rid of knots, dreads, and otherwise unattractive hairy situations. Then, this summer, after I moved into the house with my own cats, Miles seemed to become, well... depressed. He quit grooming, started whining, and developed a drinking habit (water, that is... a serious preoccupation with water from the faucet).
 |
| Before |
He's since been to the vet who suggested a grooming. (I'd tried to comb out the knots, but even with my expensive, well-made brush, wasn't making much progress.) So Mark took him for a lion cut.
 |
| After |
Honestly, he looks totally ridiculous, cute, and fragile. I'm practically afraid to pick him up now. BUT, on the plus side of things, his fur will grow back and we're hoping he'll keep up the maintenance (with our help) to be a happy, comfortable, handsome kitty.
The other cats seem interested in his new look (and probably the smell of the groomer's that's lingering).
He also wasn't too interested in posing until I played with him, but these pictures are priceless. I'm sure his fur will grow back before I even know it, so I have to capture this pictures while I can!
And soon, posts of awesome craft projects... I hope!
December 17, 2012
Life and cats lately
I've been so busy lately I'm going to post pictures of cats that I didn't even take. Tonight (right now!) is my final class period of the semester, and I've been slaving over Christmas gifts without time to even post a few pictures of my projects. Mark got a new fancy camera and cats were (naturally) what he wound up practicing his photography skills on.
Here are a few shots, one of each cat:
Here are a few shots, one of each cat:
Jake looking slightly annoyed with being photographed.
Miles seriously milking his good looks.
I swear, Dexter is the cutest of them all, yet the least photogenic. We'll need to practice with him.
And Jack. Probably the most photographed of them all. He lives for the camera.
So that's all for now. In a few days, when all the holiday insanity is over, I hope to be back to semi-regular posting. I have some major projects to show off once all the gifts have been distributed and they're safe to be seen on the internet!
November 17, 2012
Thrift find: incomplete embroidered wall hanging
It sat for a little while, and then I got to work finishing it. Really, all I needed to do was the basket of flowers, the lines on the floor and wall, and a few other tiny details. The small bit I did do took me quite a bit of time; I needed to learn stitches and get them looking like they fit in with the rest of the work. You can see some wrinkles from the embroidery hoop that the fabric likely sat in for years, but I haven't figured out how to get rid of them out.
The detail and attention put into the piece by whoever started it is just beautiful. I wonder what happened to prevent them from finishing. The copyright on the package was from the 70s, but because the original price tag said $25, I figure it wasn't purchased that long ago BUT since the tag was also from a craft store/ greenhouse that I used to work at that closed nearly ten years ago, it's not too recent. Anyways, I'm so glad I found this and was able to finish it. I found a frame at the thrift store for $2 that fit perfectly.
I love the cat on the afghan. I'd love an identical, full size one like that to curl up with. I mean, the blanket, not the cat... we have enough felines in our home for now.
I think the cats like the piece too. I hung it above the bookshelf in our dining room. Five dollars well spent!
October 19, 2012
Etsy Weekly Wants #7: Keeping Warm
So, here's the deal. I've been absolutely terrible about posting lately. I was designing a calendar which took up much more time than expected and seriously stretched my graphic art skills. However, it was a good professional experience and I'll be excited to see it in print.
Well, our weather here in Minnesota has gotten cooler. We had a close-to-70 degree day this week and managed to hit up a patio one last time. New priority: fighting off the cold!
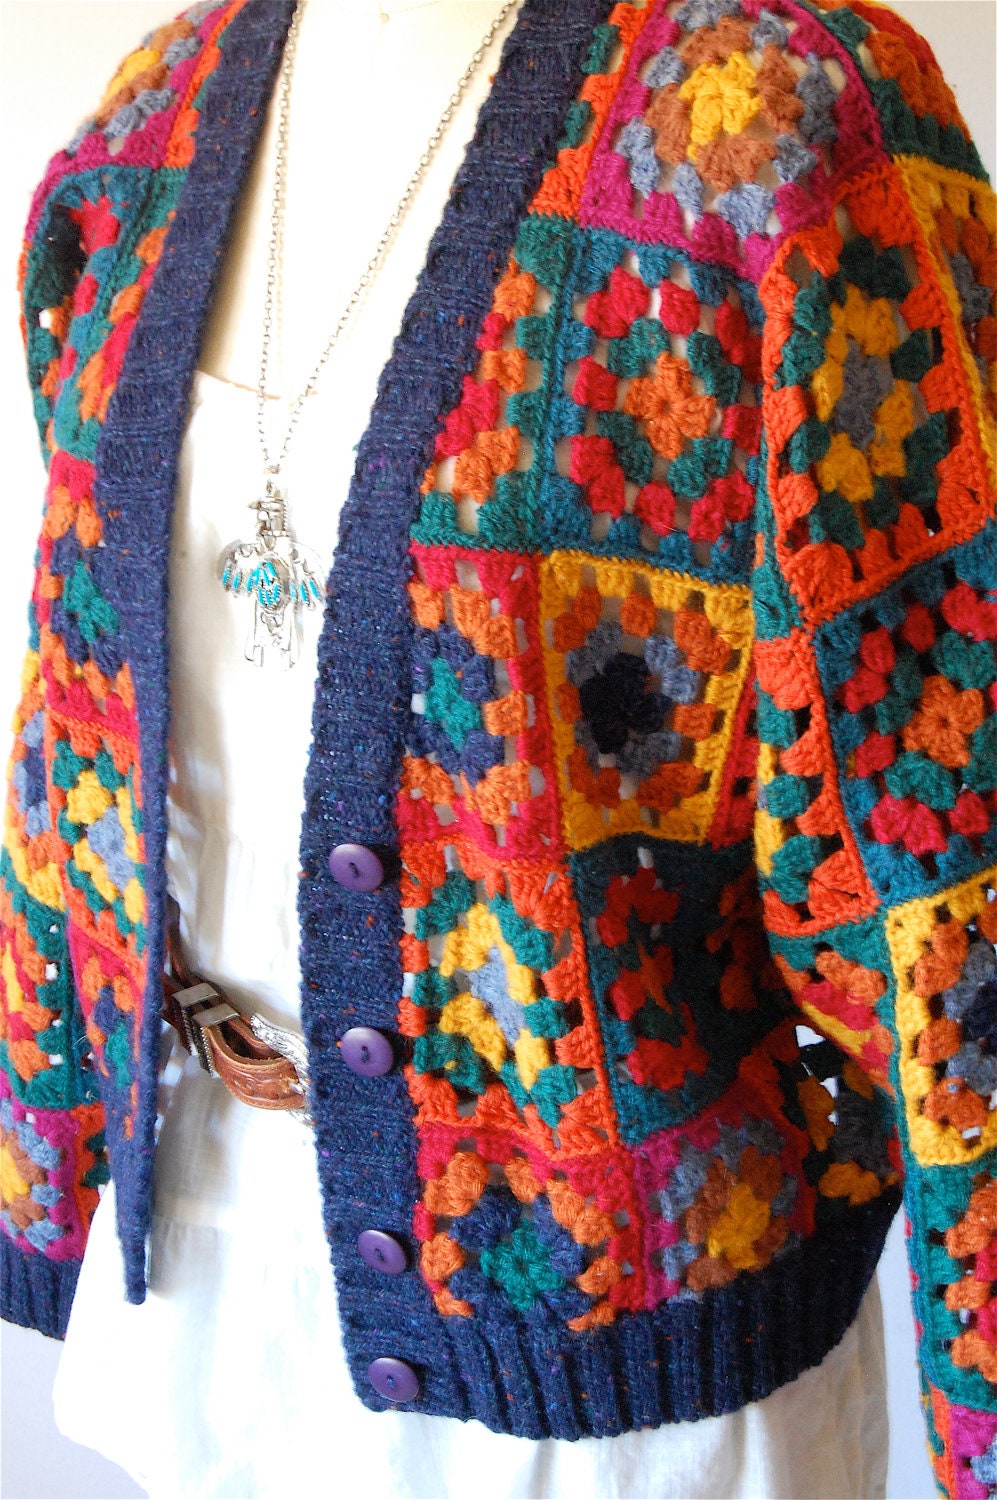
First I need some cozy sweaters. I feel like I struggle to find ones that are warm, but breathable. This one looks perfect (especially the colorful granny squares!). It's from hausofmirth.
This is such a nice felted blanket! So many lovely sweaters all in one thing. We have a lot of blankets, but I'd have no problem replacing some of the older grungy ones for something like this. By laprincessa.
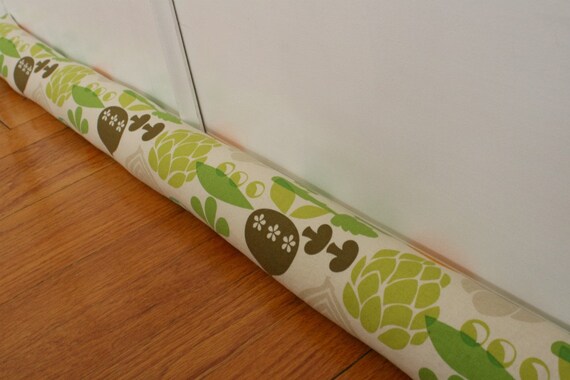
A door draft stopper from ogsplosh. Our house has beautiful old doors, but unfortunately, they are a little drafty. This cute veggie print would look great in our house and keep the chilly air out. Maybe Ican even try to make my own...
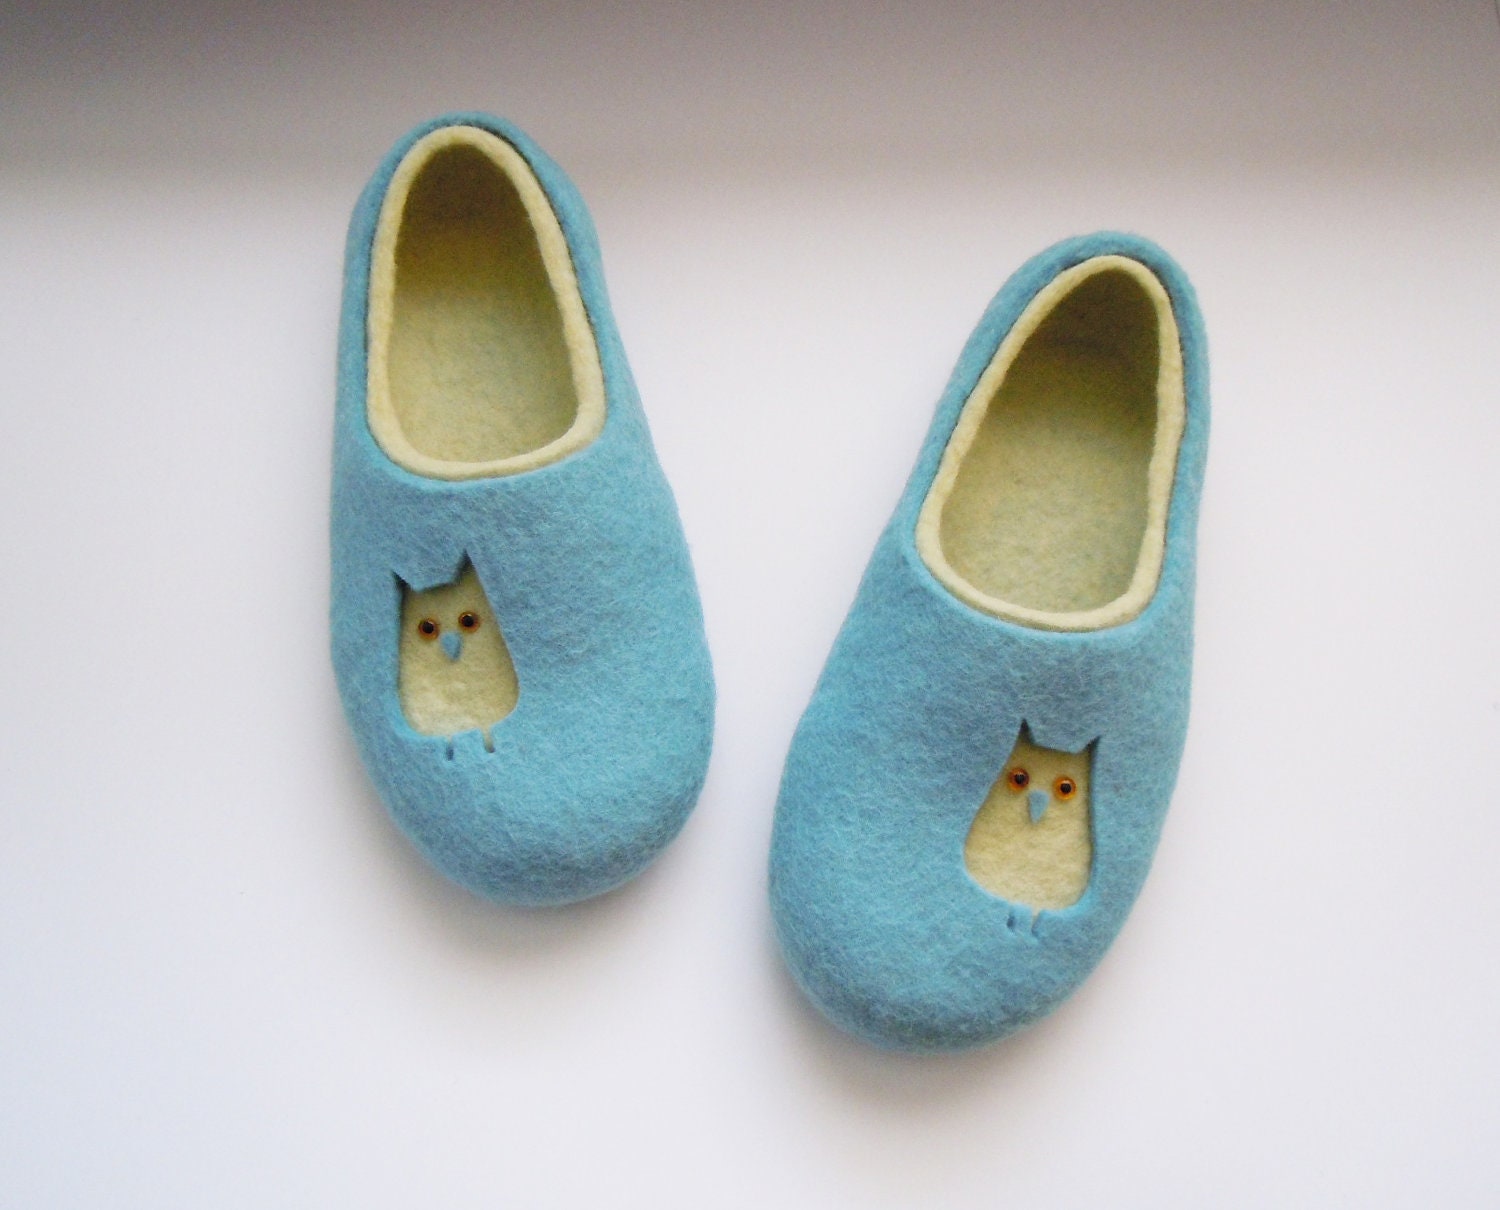
I need some new slippers! I got a cute pair at Urban Outfitters for $5 last year, but they wore pretty quickly and it would be nice to replace them soon. I saw lots of felted pairs on Etsy, but these by Simonascrafts really stand out with their owl detail.
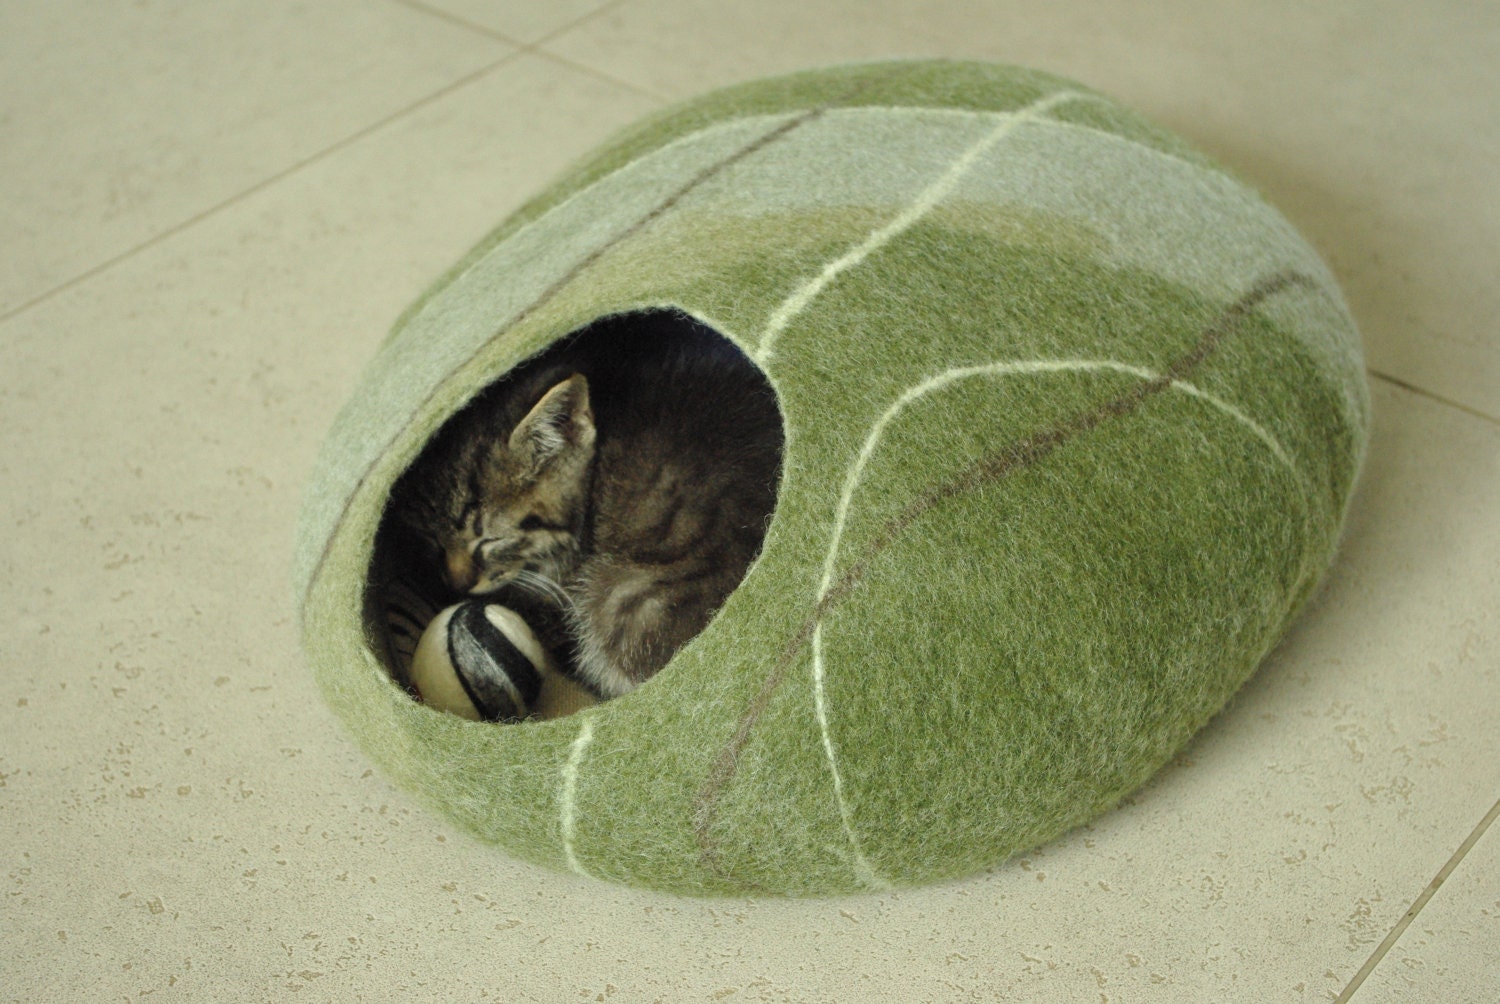
And finally, something for the kitties too! This felted bed by elevele looks like a delightfully warm spot for the animals in our home to curl up on cool evenings.
And now I really hope to be back to posting regularly. I have a great Halloween costume I'm working on that I'll definitely need to show off!
September 13, 2012
Cat dentistry
Well, Mr. Jake went to the vet today for some much-needed dental attention.
(Clearly unimpressed, and also has a transparent head?!)
Mark has had him for years, and I think as his stinky breath got worse, Mark's nose just adapted. Now that I've known Jake for almost a year but still can barely sit on a couch with him, we decided it was time to figure out what was up. He went in last week for the check-up and the vet suggested an intense cleaning and maybe pulling some teeth.
He went in today for his big appointment. All four canines- gone. And as you can see above, they were quite impressive. All together the vet pulled 8 teeth.
He's pretty drugged up now, and we're going to have to make some dietary changes to accommodate his less-toothy grin/ prevent him from needing more taken out, BUT... I think he's going to be much happier now. Plus, now I can cuddle with him and his breath won't force me to move him away. (Seriously, I'm a cat person, but it was that bad!)
So, goodbye lovely grin, and hello much happier and healthier old man cat!
(I realize this picture makes him look crazed, but it was too funny to pass up!)
September 09, 2012
Changeable scenery terrarium pendant
A few months back I saw some great terrarium necklaces on Etsy and Pinterest, and decided to make my own.
I looked all over online for pendants that would work for this project and wound up buying a set of two shadow box pendants from HHHdesigns for around $11. They're copper and big enough to make some cute little scenes inside. They're a little bigger than a typical pendant, but despite that, it was still a challenge to find small enough figures to put inside. I had a little owl that I thought would be perfect, but, like, one claw on his tiny foot stuck out too far to fit.
Initially, I put Velcro in the back and bottom of the box and on the felt I used for the scenes, with the thought that it would make it easier to change scenes out. Unfortunately it was too bulky. I ditched that and sewed the felt into little L shapes, connecting the back and bottom pieces so they'd sit in the box without any support or adhesive.
First I made this little duck scene (although I did redo it before this picture, after the Velcro idea failed). The ceramic duck was $1 at the Mall of Saint Paul. The water is felt and beads, sky- felt, cloud-batting, sun- felt, and the reeds are felt and sticks from the end of incense. All I bought for these scenes were the animals, the rest was from around the house with felt as the main medium.
I got this glass cat at a bead store for $1.50. I used some rhinestone beads for stars and felt for the rest. The great thing about the cat bead is that it has a hole. I used wire to attach it to the felt.
Now, this elephant is probably my favorite and cost a little more ($5 at the Mall of Saint Paul), but I love it. It's pewter and pretty heavy. I put felt hills behind it and a bead for a setting sun.
And last is this cute little ceramic bluebird from an antique store for $1. I used twigs from the yard and star beads. This is the only one that doesn't have a felt base at the bottom of the box, but the twigs fit snugly and hold it all in place.
I think this pendant is going to be great to switch up and wear, especially to work for the kids in my class! I want to find a chain or cord that matches better than my typical silver chain.
Honestly, when I first took on the project, I thought it would be something I could duplicate and sell on Etsy, but it took so long to find the tiny animals for my own necklace, that it would be a pretty time-consuming. I'm happy with this being a personal project that maybe other people can try out and have fun with! I'd love to see other ideas and results, so please post anything that you make!
September 01, 2012
Pinterest Project 1: bird's nest pendant
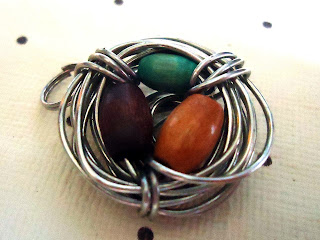
While this may not be my first attempt at a Pinterest project, it's the first I'm documenting via blog. This one is a bird's nest necklace. I found the project on Pinterest (obv.), and the link to the original tutorial is here.
It was super easy to follow, and only took about half an hour to get it looking the way I wanted. A cute, simple project with things I already had lying around! I used some basic thicker wire and wooden beads.
Dexter helped me model my new necklace.
Give this a try for a simple wearable craft or maybe a gift for a friend!
August 17, 2012
Etsy Weekly Wants #1: Yellow brooches
I've been looking to start a new weekly piece. I read a lot of bloggers that do their day-of-the-week favs, so I'm going to try out something along those lines. Since I have an Etsy Favorites list that goes on for pages, I figured that's a great place to start. Plus, I can sort through at the same time and remove things that have sold.
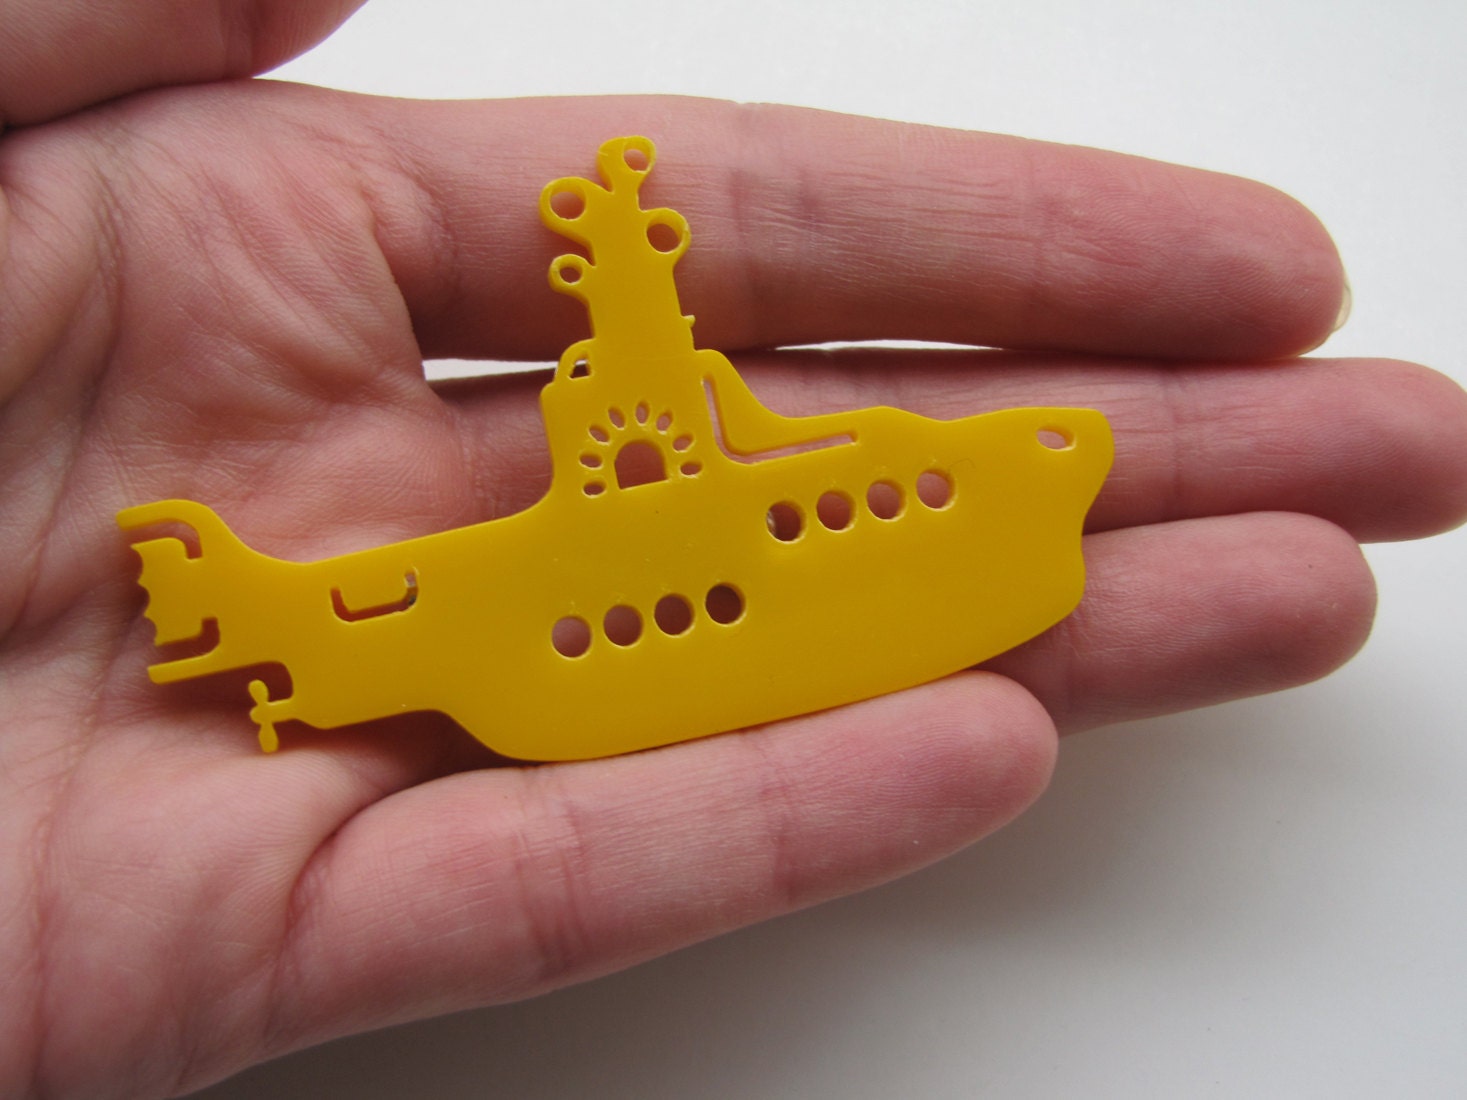
This week I'm starting with brooches. Yellow brooches, to be specific. I used to wear a lot of pins, but lately I've barely been accessorizing. I think some of these would be perfect to wear with a summery dress over the next few months, or with a sweater come winter.
I love this acrylic yellow submarine from indomina.
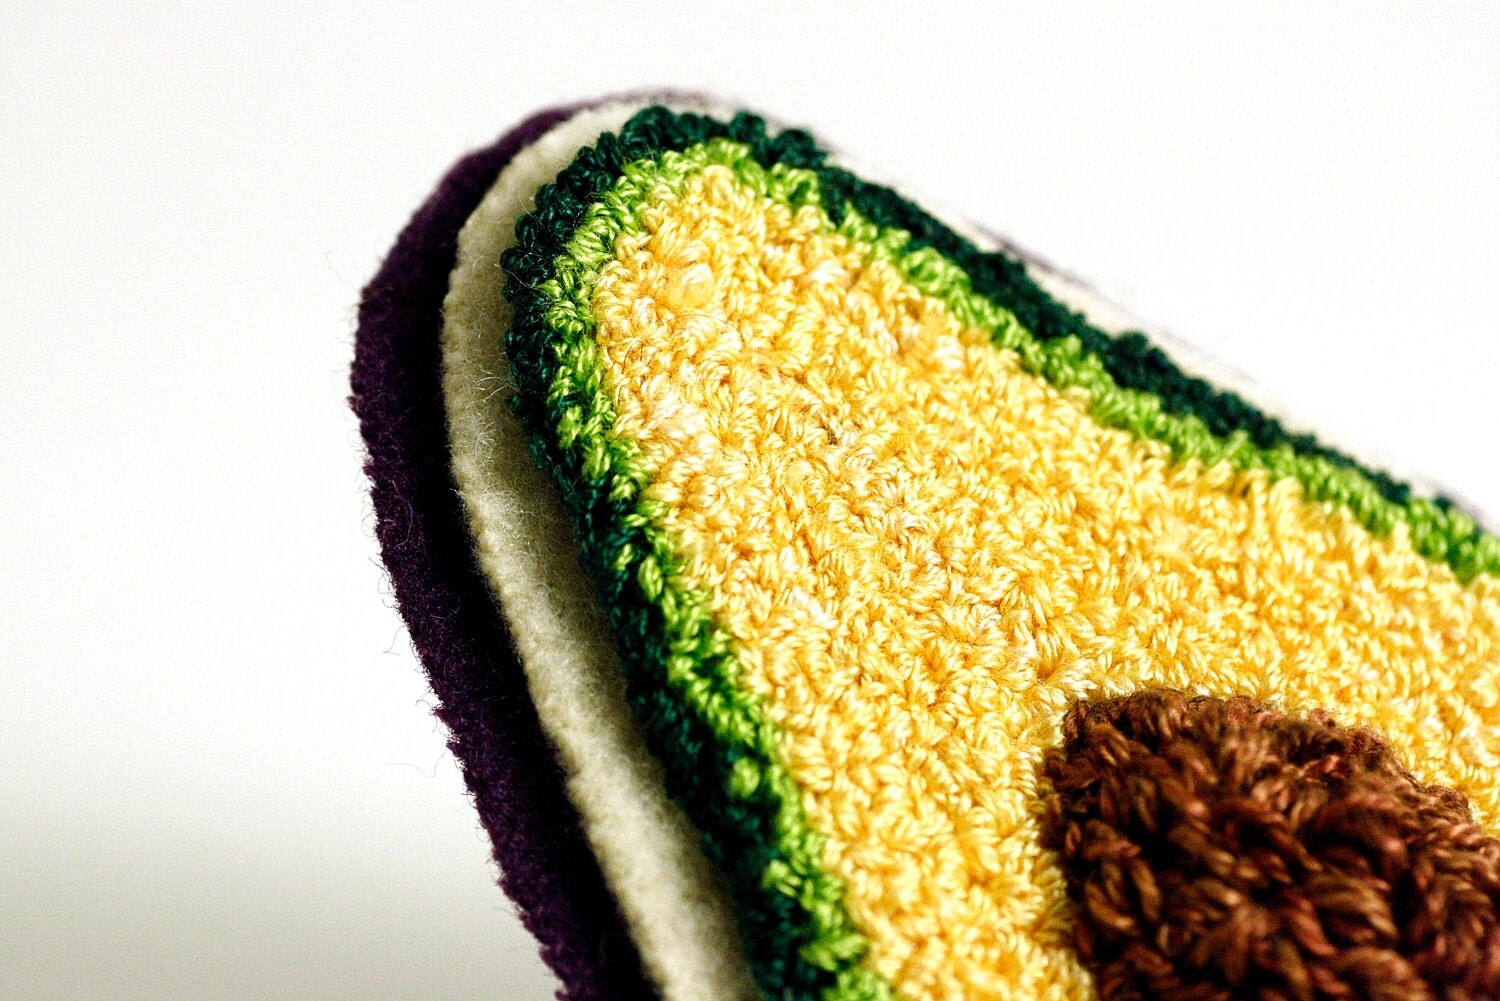
This embroidered avocado from HarpandThistle. I love the depth shown with the pit and the fruit.
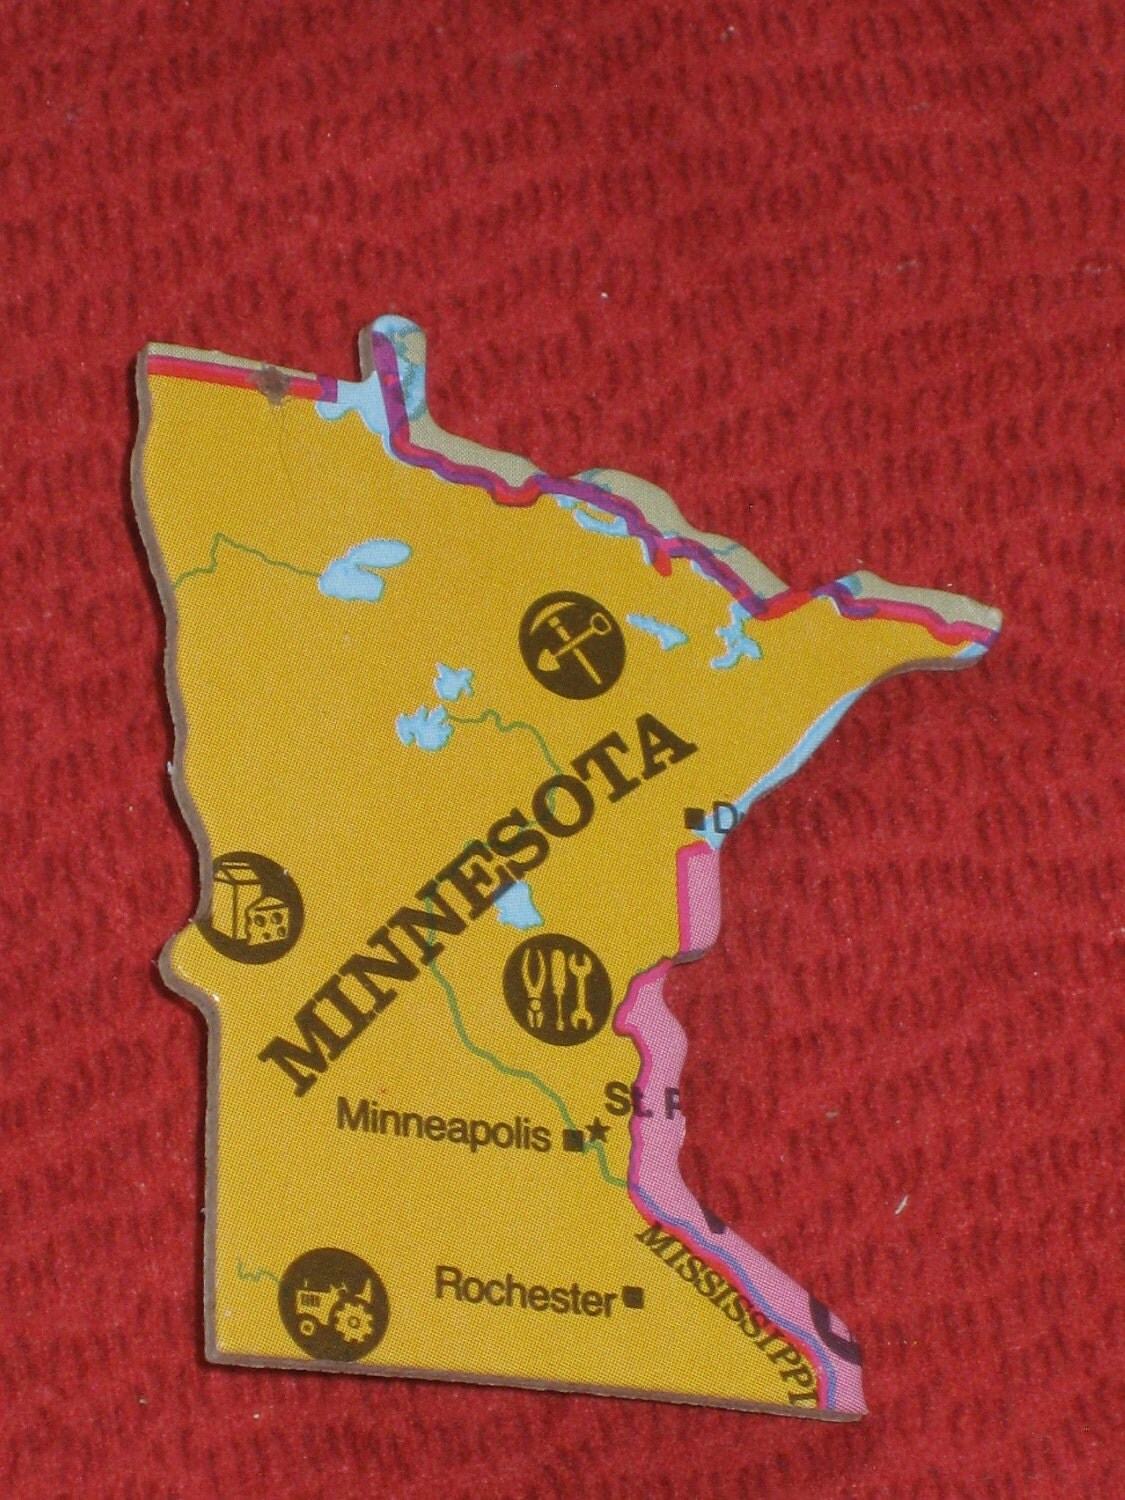
A Minnesota pin from a vintage puzzle piece by IvyEvaine. Fun! I just wish you could read "St. Paul" completely. ;)
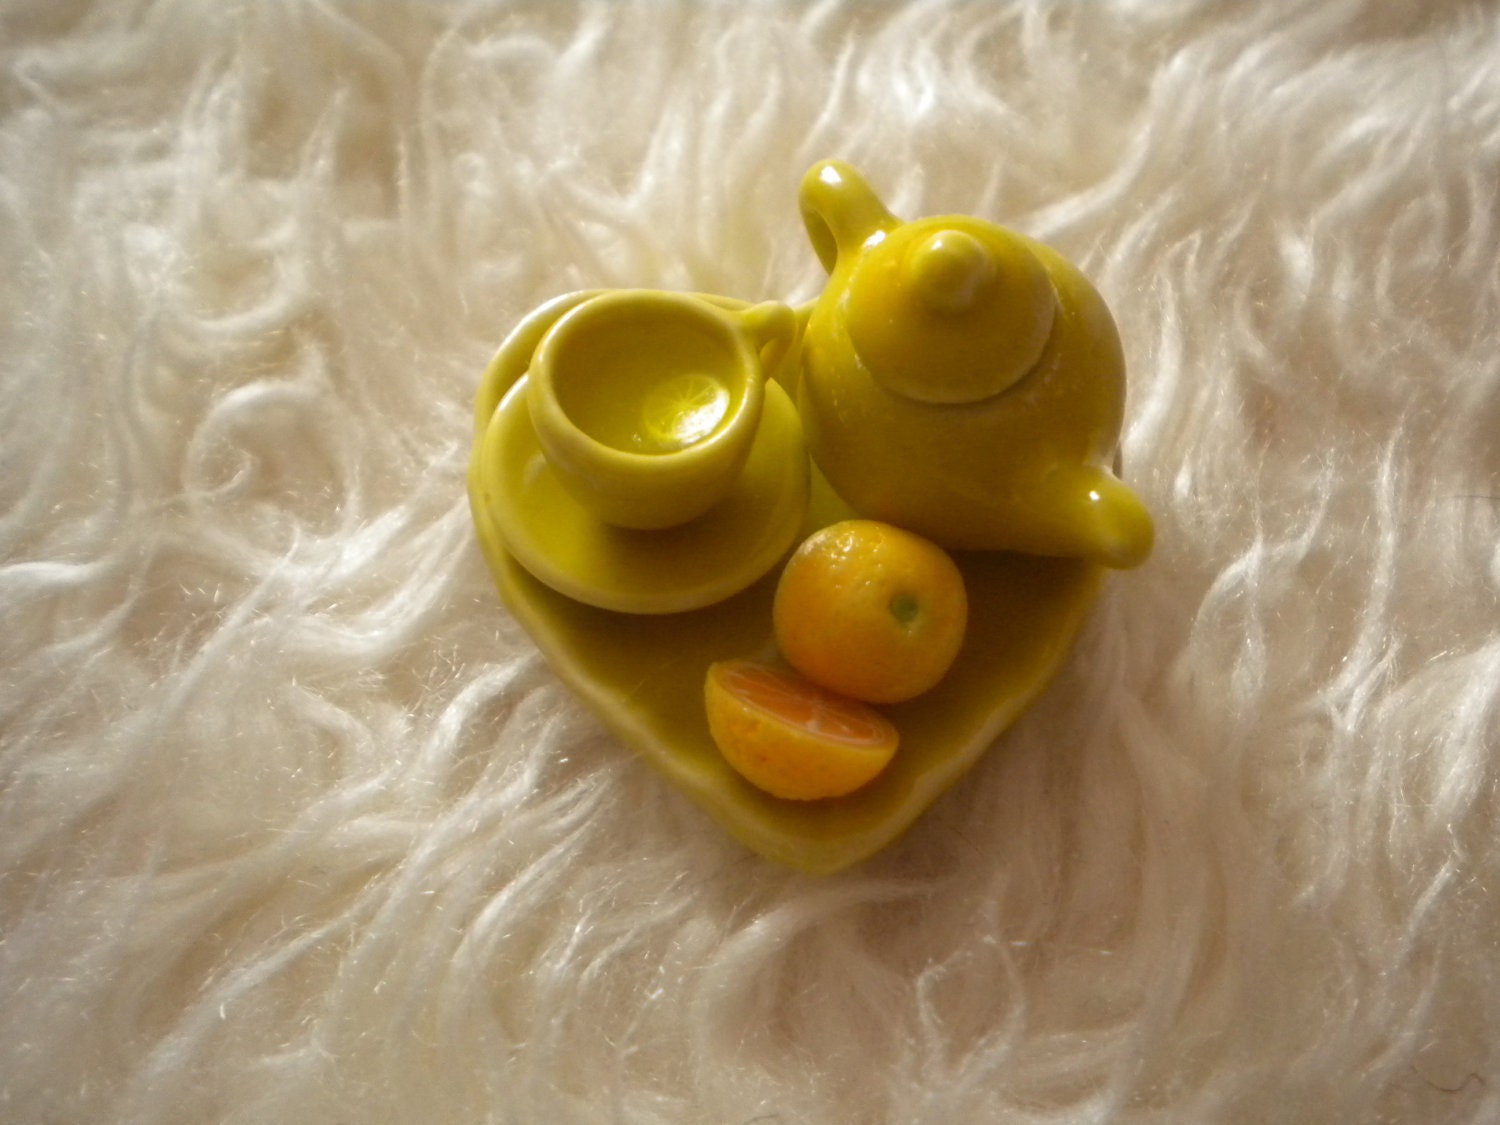
Miniature teapot and accessories by asiskooo. Tiny things are always great. Always.
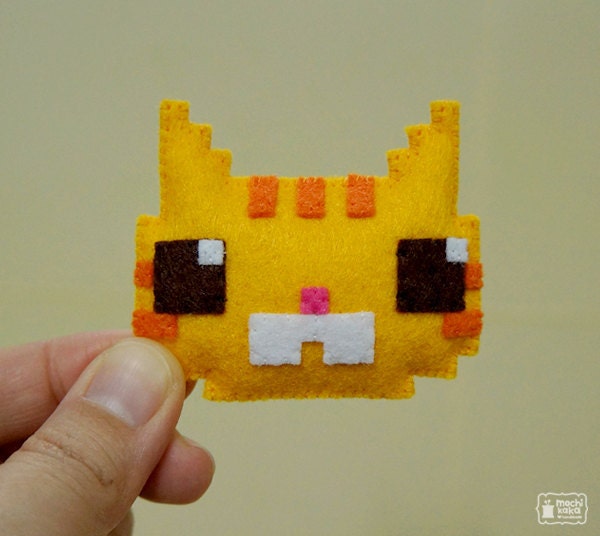
And this cute felt kitty by mochikaka:
I'm considering buying one of these with some PayPal credit I have in my account, but I just need to decide which. And if you want to check out my Etsy store for some of my stuff!
March 18, 2012
Weekend thrifting
Well, my favorite little thrift/antique store down the street (The Mall of St. Paul) had a sale this weekend. I had a few items I was keeping an eye open for: a jewelry box, a flour sifter, patio furniture, unique jars (for the boyfriend), and a larger floor-sitting cantilever sewing box like the awesome one in Elycia's post. Even if I didn't find any of those items, it's still always worth a visit to see what's new.
I saw loads of cute stuff.
I love vintage cooking canisters, but I have a full kitchen, so no more for me.

Jars, jars, jars.

Embroidered artwork is my favorite, but when I saw this one I had to smile- it was $30, but we got the exact same one at Goodwill for $3! What a bargain! Yeah, I'm not sure what the picture is (a monk and a church?) but the colors are great!

Kitties!

Old coffee grinder with a little drawer where the coffee comes out. Cute, but I must admit, modern technology is a very necessary before my morning caffeine.

What I came home with:

One big fancy jar for Mark and a glass mushroom. The cap of the mushroom comes off and one suggested use on the old piece of packaging was a terrarium. I've been looking for the perfect terrarium container for a while and this is it! Now to find a tiny plant and some moss for it!
Jar: $7.50 at 15% off = $6.38
Terrarium: $7 at 15% off = $5.95
I saw loads of cute stuff.
I love vintage cooking canisters, but I have a full kitchen, so no more for me.

Jars, jars, jars.

Embroidered artwork is my favorite, but when I saw this one I had to smile- it was $30, but we got the exact same one at Goodwill for $3! What a bargain! Yeah, I'm not sure what the picture is (a monk and a church?) but the colors are great!

Kitties!

Old coffee grinder with a little drawer where the coffee comes out. Cute, but I must admit, modern technology is a very necessary before my morning caffeine.

What I came home with:

One big fancy jar for Mark and a glass mushroom. The cap of the mushroom comes off and one suggested use on the old piece of packaging was a terrarium. I've been looking for the perfect terrarium container for a while and this is it! Now to find a tiny plant and some moss for it!
Jar: $7.50 at 15% off = $6.38
Terrarium: $7 at 15% off = $5.95
Subscribe to:
Posts (Atom)


